Monday, May 31, 2010

Menu Plan Monday - May 31


Happy Memorial Day! I hope you are all enjoying a day off of work and relaxing with those who matter most. Unfortunately, my husband has to work today. It's a short day, though, so we will be able to enjoy the day during the afternoon. The kids just got a new kiddie pool over the weekend, so I have a feeling we will be spending a lot of time in the backyard.

The heat has really set in lately and with that comes low appetites. Our meals this week are light and healthy.

Monday: Southwest Chicken Salad with Green Chili Dressing

Tuesday: Carnitas Tacos with all the fixings

Wednesday: Spinach and Ricotta Stuffed Crespelles, tossed salad, french bread

Thursday: Brazilian Black Beans with rice

Friday: Red Bell Peppers Stuffed with Rice, tossed salad,

Lunches include:
Spinach and Feta Quiche
Tuna Salad
Chicken, Spinach and Feta Mini Calzones

Breakfasts:
Baked Oatmeal
Scrambled Eggs with Scallions and [garden fresh] Tomatoes
Mango with Strawberries, Blackberries and Lime

I hope everyone has a wonderful week! For more menus, check out Orgjunkie.com

Thursday, May 27, 2010

White Chocolate Macadamia Nut Cookies


It seems like every time I make cookies, I end up making chocolate chip...which isn't a bad thing, but I've been craving something different. I stumbled across some white chocolate macadamia nut cookies on Annie's Eats the other night and remembered the bag of Ghirardelli white chocolate chips in the pantry that I've had for ages. It always was cast aside in favor of semi-sweet or dark chocolate chips. I looked around at other recipes and formulated what I thought would fit my family's tastes best. We're a chunky cookie family and this cookie is loaded with big hunks of salty, rich macadamia nuts and sweet, creamy white chocolate.

I love that Husband has a job where I can send the cookies to work with him. Having these in the house would be far too much temptation!


White Chocolate Macadamia Nut Cookies
makes 24

1/2 cup unsalted butter
3/4 cup white sugar
1 egg
1 tsp. pure vanilla extract
1 1/4 cups all purpose flour
1/2 tsp. baking soda
1/2 tsp. salt
8 oz. white chocolate chips, or bar, chopped
6.5 oz. macadamia nuts, chopped coarsely

Preheat oven to 350 degrees.

In a large bowl, cream butter and sugar together. Stir in egg and vanilla.

Combine the flour, baking soda and salt in a separate bowl. Add to the butter mixture. When thoroughly mixed, add the white chocolate and chopped nuts. Stir to combine.

Drop cookies by heaping teaspoonfull onto an ungreased baking sheet, about two inches apart.

Bake for 8-10 minutes until very lightly browned. Remove from oven and let cool on baking sheet.

Store in an airtight container.

Wednesday, May 26, 2010

Sophi P. Cakes Cupcakes

Today was the grand opening of Sophi P. Cakes in Lafayette, Louisiana. They advertised cupcakes, quiche and cheesecake being available. I'm always interested in trying new, exciting flavors so I loaded the kids up and went to check it out. The flavors available were pretty picked over, which was disappointing. I was expecting a lot of fun flavors and there were a few, but too few.

We tried three flavors. Peanut Butter Cup, Classic Red Velvet and a Kahlua/Cappucino.

Here are my notes on each.


Peanut butter: Cake has good texture, not overly rich or chocolatey. Kind of forgettable in flavor, but moist. Icing: I would have expected a peanut butter frosting, but it was a chocolate buttercream - really light on the chocolate. It had good texture, albeit a bit grainy. Sort of bland tasting. It was filled with more chocolate buttercream with chopped peanut butter cups, which was really the best part. I think it would have been better overall with peanut butter frosting.


Red Velvet. Cute cupcake. Cake is bright red, sort of dry with a tight crumb. Nothing spectacular. I'm really particular about Red Velvet. I've tasted it everywhere. I missed that delightful little tang from the vinegar. The cream cheese frosting was excellent though. Nice texture, nice tang. It was filled with a bit more cream cheese frosting, which I could have passed on. It tipped the scales on the frosting to cake ratio...but I realize that is completely my opinion and a lot of people really love a ton of frosting.


Kahlua/Cappucino: The frosting is really sweet, nice texture, nice boozy aftertaste. I want to think it has chocolate in it, but I can't really taste it. The cupcake tastes like a vanilla cupcake with a shot or two of kahlua...which isn't a bad thing. This cupcake wasn't labeled and the person working the counter didn't really know anything about it...so I'm lost as to what they were aiming at with this variety. The overwhelming flavor was kahlua...so I'm going with that. It was overall pretty good. Too big to really finish though as the flavor became a little cloying after awhile.


They had two sizes of cupcakes available, small for $1.69 and large for $2.89. The large could definitely be split between two people because it is so sweet.


Overall, I was unimpressed. The cake tasted like it was from a box mix and if I am going to pay money for something...it had better be better than what the average home baker can make. The frosting was decent, tasty, had nice texture but it wasn't something I would call outstanding. The entire experience was rather uninspired. I only wish the shop would have had their more exotic flavors available for purchase. There were many tags that sounded interesting.

They do make beautiful cakes though, although nobody could really give me any answers about pricing or anything.

I do hope that the kinks get worked out as Lafayette really could use a decent cupcake shop.

Taco Rolls


I had my doubts about these the first time that I made them. They were excellent...but putzy. Mama doesn't have time during the week to be putzing with lunch. I loved the flavor enough to give them a second try and this time, they were great all around. I used a different bread dough and they were much easier to handle. The recipe makes a ton and they are very filling, so one recipe will make lunch for a few days...which I love.

You could easily substitute refrigerated or frozen bread dough, but I love the texture and flavor of homemade dough. I haven't tried anything that could compare, but in a pinch the pre-made stuff will do. I would normally use whole wheat bread dough, but I ran out of whole wheat flour. Feel free to use your favorite whole wheat bread recipe.

The cream cheese/sour cream mixture cuts the spice of the taco seasoning and adds a creaminess that my kids really loved. The green onions added a fresh element and a crunchy texture.

Taco Rolls
makes 20-ish rolls

1 recipe bread dough
1 lb. lean ground beef or turkey
1 package taco seasoning
2/3 cup water
1 1/2 cups cheddar cheese
4 oz. neufchatel cheese (1/3 less fat cream cheese), softened
2 T. light sour cream
2 green onions, chopped

Prepare bread dough according to recipe directions.

While dough is being prepared, brown ground beef or turkey in a large skillet. Drain the fat off and add 2/3 cup water and the entire taco seasoning packet. Stir until combined. Reduce heat and cook, stirring frequently, until the liquid is gone. Let cool completely.

Preheat oven to 375 degrees.

Turn the dough out onto a well floured surface. Roll the dough in a large rectangle, about 18 inches x 10 inches. If the dough is too spongey to roll, let rest a few minutes and try again.The dough shouldn't be too thin or it will tear. Aim for 1/4-1/2 inch all around.

Combine the cream cheese, sour cream and chopped green onions in a bowl. Spread over dough rectangle leaving a 1-inch border around the edge of the dough.

Top cream cheese mixture with ground beef and finally the cheddar cheese.

Roll up cinnamon roll style - starting with the long edge closest to you. Pinch the edges to seal.

Slice into 1/2-inch slices with a serrated knife. Some of the filling with inevitably fall out, so just stack it back on top of the roll after it is placed on the baking sheet. Place 2-inches apart on a large, greased baking sheet. Bake at 375 for 18-20 minutes or until golden and the dough is cooked through.

Monday, May 24, 2010

Menu Plan Monday - May 24


I can already tell that this is going to be one hell of a week. I was up until nearly 3 this morning with random allergy attacks and sinus headaches. I've been battling a sinus infection all week and I'm still dealing with residual head-poundies. I sit here pounding coffee in hopes that it might give me just a tad bit of patience with my kids today, but I realize I might be fighting a losing battle and am considering shipping them to their grandmother's house for the day. Ah. Sweet reprieve. I'm also considering actually doing my Spring cleaning this week. I have lists and lists that I've developed from Martha Stewart's Homekeeping Handbook...I think I might be over my head on this. The first thing I noticed that told me this book wasn't for me was the fact that actually folded her fitted sheets...wait...you mean not everybody just rolls them up into a rectangular-ish form and stuffs them in the linen closet?


Needless to say, the menu this week includes a lot of slow-cooker and prepare-ahead meals. My favorite kind!

Monday: 3 bean turkey chili in the crockpot, jalapeno cornbread

Tuesday: Eggplant parmesan, salad, french bread

Wednesday: Roast, mashed potatoes, salad

Thursday: Green chili turkey burgers, sweet potato fries

Friday: Buffalo sweet potato and blue cheese grilled pizza, caprese salad

Lunches:
Taco Roll-Ups
Chicken, Spinach and Feta Calzones
Buffalo Chicken Wraps

Breakfasts:
Baked Oatmeal
Banana Bread
Berry Scones

You can find more menus here. Have a fantastic week everyone!

Thursday, May 20, 2010

Barbacoa


If I could eat this for every meal for the next two weeks, I would. It is so versatile. Roll it up in a burrito, put it over some lettuce for a salad, put over rice, add cheese, onions and salsa. It's spicy and full of flavor.

The heat tolerance in this family is pretty high. The baby would eat a lot of this as long as he had a cup of milk handy to wash away the lingering heat. Feel free to add fewer chipotle peppers if you don't like it quite so hot.

I served this two nights, the first night over brown rice with corn salsa, avocado and purple onion. The second night, I made tex-mex black bean salad and topped it with barbacoa. Both are equally delicious and had my husband coming back for seconds, thirds, fourths...every time he took more, he kept commenting on how great it was.

I chose to make this in a slow cooker. It would work in the oven too, but I'm not very hands on when it comes to adding more water to the roasting pan. I usually forget and my meat comes out looking more like a hockey puck than dinner. There is a bit of initial preparation, but then it cooks all day (and makes your house smell fabulous!). I used a trimmed sirloin tip roast, feel free to use your favorite cut or whatever is on sale that day. I love slow cookers because you can add a
shoe leather piece of meat and at the end of the day, it's melt in your mouth tender.


Beef Barbacoa
serves 10 generously

4 lbs. sirloin tip roast, trimmed of all visible fat
kosher salt
fresh cracked pepper
8 cloves of garlic
1/2 onion, quartered
4 chipotle peppers
3 T. adobo sauce (the liquid with the chipotle peppers)
1 T ground cumin
1 T. ground oregano
1/2 tsp. all spice
3 bay leaves
1 cup water

Place the garlic through the all spice in a blender or food processor (my mini food processor worked wonderfully) and process until it turns into a thick paste.

Season your roast liberally with salt and pepper. In a large skillet, brown roast on all sides (you may need to cut it into smaller pieces to fit into the pan).

Add the roast to slow cooker along with the spice paste, bay leaves and water.

It took 6 hours on high to get the meat to shredding consistency. It would probably take 8-10 on low.

When beef is tender, remove from slow cooker and shred with two forks. Add back to slow cooker to coat with juices.

Serve and enjoy!

Monday, May 17, 2010

Toddler Treats


My youngest son flew under the radar and became a picky eater. My husband and I both came to the realization the other day when we noticed that the only things he really wanted to eat were bread and candy. I think my husband and I both took it for granted what a wonderful eater our 4 year old is and just assumed that since we started our 16-month old the same way (with Super Baby Food) that he would turn out the same way. WRONG. With his new ability to run and his never wanting to eat, he was losing weight fast.

We've had to install some new rules around here. no candy. no sweets until this picky behavior is gone. He fought it for about 5 minutes yesterday and has fallen into line nicely. He ate an entire turkey sandwich, half an avocado and 4 strawberries after a little prodding. This morning, he had oatmeal sweetened with agave nectar and coconut oil with blueberries and a berry smoothie (with a little avocado mixed in) and loved every bite.

I think we had second child syndrome a little too much in this instance and really needed to get back to the basics nutritionally that we've always considered so important with our kids.

I made these for snacks today. They have lots of good fat, whole grains and use dried fruit and honey to sweeten. They really were a hit and I suspect they will become a favorite with both kids. Best thing? The 4-year old made them almost entirely himself.


Granola Toddler Treats
makes 20 1-inch balls

1 1/2 cups rolled oats
1/4 cup wheat germ
1/4 cup ground nuts (my kids prefer pecans)
1/4 cup nonfat dry milk
1/4 cup natural peanut butter
4 T. honey or agave nectar
1 beaten egg
1/4 tsp. vanilla
1/4 tsp. cinnamon
1/2 cup dried fruit, chopped fine (we've tried prunes, apricots, dried pears and cranberries and all have been excellent!)

Mix all dry ingredients. Mix honey, peanut butter and vanilla into dry mixture. Add more honey to moisten ot dried oats to dry if necessary. Form into small balls. Bake at 350 for 10 minutes. They will keep in the refrigerator for 5-7 days. 

To make granola bars, press mixture into an 8x8 baking dish. Bake at 350 for 15-20 minutes, cool and cut into bars.

I'm editing this after some thought. I need to add that honey and nuts are not appropriate for children under 1 year of age. If you are making these for younger children, omit the nuts entirely and increase the wheat germ to 1/2 cup. Omit the honey, and use either agave nectar or just leave the sweetener out completely - it really isn't necessary. Replace the peanut butter with 1/4 cup melted butter or 1/4 cup mashed banana.

Menu Plan Monday - May 17th


It is that time again, folks. Monday. The start of a whole new week. My husband found a job for the summer so a huge stress burden has been lifted from my shoulders and once again, I can see the week for what it is: a beautiful blessing. The family is healthy this week (cross my fingers) and the weather looks promising. We have a lot of fun things planned.

Monday: turkey sloppy joes, whole wheat hamburger buns, broccoli slaw, baked sweet potato fries

Tuesday: tilapia curry stew, jasmine rice

Wednesday: beef kheema, brown rice, balsamic roasted carrots

Thursday: barbacoa from last week repurposed into bbq beef sandwiches, salad, grilled veggie kebabs

Friday: Root vegetable cobbler with chive biscuit topping (lightened, recipe posted soon), salad

My lunches this week include:
thai roll-ups and veggie wraps

Our breakfasts include:
apple pie muffins, mango madness fruit salad and fluffy whole wheat pancakes with triple berry sauce

I hope everyone has a blessed and safe week.

Sunday, May 16, 2010

Low Fat Carrot Cake with Cream Cheese Frosting


I brought this to a luncheon and it received rave reviews. I don't know if they fawned over it because it was legitimately good, or because they are my friends and they love me. It WAS excellent though. It wasn't too sweet and was incredibly moist. The cream cheese icing was great and the layer on top was just the right amount. If you prefer more frosting on your cake, you're free to ice the sides or just layer it up more on top. My family isn't big into icing and this was the perfect cake to frosting ratio for us.  I was iffy on making the icing because it didn't include butter and I didn't know how it would hold up, but it was delicious and was very substantial. This will be my go-to spreading cream cheese icing, as I didn't miss the butter at all. The only consideration I might have is that it probably wouldn't pipe very well.

In the end, this is a flavorful, healthy, delicious take on a carrot cake.

Skinny Carrot Cake
adapted from Gina's Weight Watcher Recipes
makes 16 good-sized slices or 24 cupcakes

1 cup whole wheat pastry flour
1/2 cup all-purpose flour
1/2 cup granulated sugar
1/2 cup light brown sugar
1/4 cup flaked, sweetened coconut
2 tsp. baking soda
1 tsp. salt
1 1/2 tsp. ground cinnamon
1/4 tsp. all-spice
2 Tbsp. canola oil
2 large eggs
1 1/2 tsp. vanilla
2 cups grated carrots (I process mine in the food processor to make them less chunky)
20 oz. canned, crushed pineapple, drained
1/4 cup chopped pecans

Cream Cheese Frosting
8 oz. neufchatel cheese (1/3 less fat cream cheese), softened
1 cup powdered sugar
1 tsp. vanilla extract
1/4 cup chopped pecans

Preheat oven to 350.

In a large bowl, mix together the flours, sugars, coconut, baking soda, salt and spices. Stir well with a whisk.

In a medium bowl, combine the oil, eggs and vanilla. Stir well. Add grated carrots and pineapple and stir well. Combine the wet ingredients with the dry ingredients. Fold in pecans.

Spoon batter in a greased 8"x3" round cake pan. Bake at 350 degrees for 38-48 minutes. It is ready when it is firm to the touch in the center and the sides start to pull away from the pan. Cool cake completely before turning out of the pan.

To make the frosting:
Beat together the cream cheese, powdered sugar and vanilla. Ice cake when cool and top with pecans.

Wednesday, May 12, 2010

Tex-Mex Black Bean Salad


Summer is quickly creeping up on us here in Southern Louisiana which means it is time for cold food. Not heating up my house with the oven is another obstacle that I need to get around when it's time to feed the family. This salad has proven to be a favorite. It is on the menu at least once a week during the summer. It makes a really great light lunch and a great side to some grilled chicken for dinner. My husband also likes it as a midnight snack, but that doesn't say much about the dish. There aren't many things that man won't eat.

This salad is spicy, creamy and refreshing. It has enough protein and good fat to fill you up and keep you that way, yet is full of whole foods so it won't expand your waistline.


Tex Mex Black Bean Salad
serves 4 as a main course, 6 as a side

1 15.5 oz. can black beans, drained and rinsed well
1 tomato, chopped
1/2 jalapeno, chopped (optional)
1 10 oz. bag frozen corn, thawed
1/4 cup red onion, chopped
1 avocado, diced
3 green onions, chopped
small handful of cilantro, chopped
juice from 1 lime
1/2 tsp. cumin
salt and pepper to taste

Mix everything together except the avocado. Let chill for at least an hour and add the avocado right before serving to avoid browning.

Tuesday, May 11, 2010

Homemade v. Store-bought: Pop-Tarts

This really shouldn't be much of a battle. Store-bought poptarts are...bland? dry? fake? full of processed ingredients? all of the above. They are pretty good at 2:30 in the morning after too many beers but that is about it. My husband does have a soft spot for the strawberry ones, but only without icing but honestly, who actually likes THAT cardboard.


I've been doing a lot of researching for these poptarts. I wanted them to be delicate and flaky, sweet but not overly sweet. The end result fit the bill perfectly.

I filled them with a brown sugar and cinnamon filling, but you could fill them with any flavor of jam you want or even nutella. omg. nutella.


Homemade Pop-Tarts
makes 8 

Dough:
2 1/2 cups plain flour
1/2 cup vanilla sugar (regular sugar works as well)
1 cup unsalted butter, chilled, cut into cubes
1 egg, lightly beaten with a fork
1 tsp pure vanilla extract
 
Combine flour and sugar in the bowl of the food processor. Add chilled butter & whiz till breadcrumb like mixture forms,.
With a fork, vigorously stir in the lightly beaten egg until all the dry ingredients are moistened and a dough starts to pull together and form a ball.
Scrape up the dough together, re-flour the surface lightly and work very briefly and quickly until you have a smooth, homogeneous dough. If the dough is too sticky, refrigerate for 10-15 minutes.

Filling:
1/2 cup light brown sugar
1 T. cinnamon
1 T. all-purpose flour
1 egg, lightly beaten

Stir together the brown sugar, cinnamon and flour. Set the egg aside for assembly.

To Assemble:
When the dough is chilled enough to roll it out, roll on a well floured surface into a rectangle 1/8" thick. Trim the edges. You're going to want 16, 3"x4" rectangles, and you may have to roll the scraps several times to get these. If the dough starts to get too sticky, just chill for another 10-15 minutes.
 
On each rectangle, brush lightly with the beaten egg. This will be the inside of your pastry. The egg will help keep the edges sealed during baking. Place a heaping tablespoon of the filling in the middle of the rectangle. Place a second rectangle on top of the first, pressing gently with your fingers around the perimeter. Seal the edges with the tines of a fork. Repeat with remaining tarts.
 
Gently place tarts on a greased baking sheet. Refrigerate for 15 minutes while your oven preheats to 350 degrees.
Remove tarts from fridge and bake for 18-22 minutes or until golden. Watch carefully during the last few minutes of baking, they go from golden to blackened in no time at all.

They really don't need icing, but if you want to add some mix together 1 cup of powdered sugar, 1 T. milk or heavy cream and a dash of vanilla extract. Drizzle over the tarts.


Monday, May 10, 2010

Menu Plan Monday


In keeping with my plan, I joined Org Junkie again this week for her Menu Plan Monday weekly round-up.

I planned for some things that I am really excited about trying this week. I also planned for some great lunch and breakfast items as my husband is home with us this week.

Sunday: homemade manicotti; homemade french bread

Monday: beef and black bean enchiladas (recipe coming soon); homemade corn tortillas; salad

Tuesday: barbacoa beef in the crock pot (variation of this); brown rice; plantain chips

Wednesday: leftover barbacoa beef; southwestern black bean salad (recipe coming soon)

Thursday: Shrimp fried rice; salad

Friday: turkey sausage, kale and white bean soup; garlic swirl bread

My lunches include:
Chicken salad pitas and Vegetable quiche

Breakfasts:
Apple Pie Muffins
Whole Wheat Pancakes with blueberry compote
Green Smoothies

I hope everyone has a fantastic week. The weather is supposed to be beautiful down in South Louisiana this week. I'm going to take every available minute to enjoy the weather with my family while my husband is home.

Apple Pie Muffins


Every week, it is tradition that I make a big batch of muffins. They turn into quick breakfasts and easy snacks.

I found this recipe when I was planning my menu last week and knew it would be perfect. Sweet enough to fight that mid-afternoon craving and hearty enough to make a breakfast that lasts until lunch. The baby in the family ate like 17 of them in one sitting. The original recipe called for all white flour, twice the butter and twice the sugar. I reduced the butter and sugar, and added whole wheat flour and hoped for the best. The outcome was still a sweet, delicious muffin with a tender crumb. The topping is optional, but makes them crunchy and really homey.

Apple Pie Muffins
makes 18 large muffins

Batter:
1 cup whole wheat flour
1 1/4 cup all-purpose flour
1 tsp. baking soda
1/2 tsp. salt
1 egg
1 cup milk
1/4 cup butter or margarine, melted
1 tsp. vanilla
1 cup packed brown sugar
2 cups diced apples

Topping:
1/2 cup brown sugar
2 T. butter or margarine, melted
1/3 cup flour
1 tsp. cinnamon

Preheat oven to 375 degrees.

For batter:
Whisk together egg, milk, melted butter and vanilla. Stir in sugar. Without mixing, add flour, baking soda, salt and apples. Stir until just combined. Do not over-mix.

For topping:
Combine sugar, flour and cinnamon. Mix in melted butter until crumbly.

Fill muffin cups 3/4 full. Sprinkle with topping.

Bake at 375 for 18-20 minutes.

Wednesday, May 5, 2010

Perfect Homemade Pizza


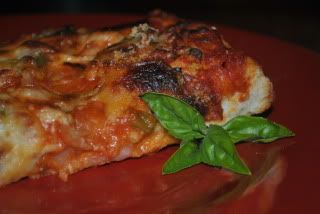
Doesn't that look amazing?

I say perfect homemade pizza because I don't have access to an 800 degree brick oven. If I did, though, it would be the best pizza ever.

I've always been let down with my homemade pizzas. There was always some element that wasn't quite up to par and it left me wanting our favorite restaurant's pizza. This time, the stars aligned and it was delicious. I couldn't imagine spending the money to get it at a restaurant anymore.

The combination of toppings isn't important, though we do have our favorites. You can substitute what your family likes. The important parts are the crust, sauce and addition of roasted garlic. nom nom nom. The crust does take some time, so you need to plan ahead. It is best to make it the day ahead to really let the flavors develop. If you don't, it won't be the end of the world, but the results after letting it rest are out of this world.

The sauce is from scratch. I've tried to make it from scratch before and it was too tomatoey, too bland...this time, I used a recipe from Cooking Light and improved on it. I just can't even tell you how important a good sauce is. You will never go back to the jarred stuff after making this. I really think that it would work in the crockpot as well. Just throw all of the ingredients in a small crockpot and let cook on low for the day.

Andiamo a mangiare!

Pizza Crust:
adapted from Cooking Light 

1 cup warm water (100-110 degrees), divided
12 oz. bread flour (about 2 1/2 cups)
2 tsp. dry yeast
4 tsp. olive oil
1/2 tsp. kosher salt, divided
cooking spray

Pour 3/4 cup warm water in the bowl of a stand mixer with dough hook attached. Weigh or lightly spoon flour into measuring cups; level with a knife.. Add flour to 3/4 cup water; mix until combined. Cover and let stand 20 minutes. Combine remaining 1/4 cup water and yeast in a small bowl; let stand 5 minutes or until bubbly. add yeast mixture, oil, and salt to flour mixture; mix 5 minutes or until a soft dough forms. Place dough in a large bowl coated with cooking spray. Cover surface of dough with plastic wrap lightly coated in cooking spray. Refrigerate for 24 hours.

Remove dough from refrigerator. Let stand, covered, 1 hour or until dough comes to room temperature. Punch dough down. Roll dough out to a 14x11-inch rectangle on a lightly floured surface. Press dough into bottom and partially up sides of a 13x9 inch metal baking pan coated with cooking spray. 

Basic Pizza Sauce
inspired by Cooking Light

2 T. extra-virgin olive oil
5 cloves roasted garlic (learn how to roast garlic here - you will need two heads)
1 (28-ounce) can whole tomatoes (go for the good stuff. San Marzano, Tuttorosso)
1/2 tsp. kosher salt
1/2 tsp dried oregano
1/2 tsp. dried basil

Our favorite toppings include turkey pepperoni, green bell pepper, fresh tomato, red onion, mozzarella cheese, roasted garlic and fresh basil.

Preheat oven to 450 degrees.

Spread the cloves of one head of garlic onto the unbaked crust. Sprinkle 1 cup of shredded mozzarella over the sauce Spread pizza sauce evenly over cheese, leaving a 1/2 inch border. Arrange toppings as desired. Sprinkle with some chopped, fresh basil. Cover with 1 cup of shredded mozzarella cheese and a sprinkle of parmesan cheese. Bake at 450 degrees for 18-20 minutes or until crust is golden. Makes 8 very filling rectangles.

Whatever toppings you decide to use, do not forget about the roasted garlic crust or the fresh basil. They turn an ordinary pizza into a restaurant-quality, out of this world pizza.

Tuesday, May 4, 2010

Whole Wheat Garlic Swirl Bread


I needed something to round out our meal last night and thought a nice bread would work just fine. I wasn't in the mood to deal with bringing the kids to the supermarket and I was sick of plain old whole wheat bread. My husband's favorite bread is garlic bread, so I decided to make a variation of that. What I came up with should probably be considered a World Wonder. I had to physically restrain myself from eating half the loaf. It made the house smell amazing too. I used the bread machine which made the entire recipe minimal as far as effort goes. This will be on our menu often.

This was the scene in my kitchen the entire time it was baking.


I won't lie and say that I wasn't doing the same thing.

Garlic Swirl Bread
makes 1 large loaf

 Whole Wheat Bread:
 3/4 cup water
3 T. butter or margarine, softened
1 egg
2 T. sugar
1 tsp. salt
2 cups bread flour
1 cup whole wheat flour
1 1/2 tsp. yeast

Add to bread machine in the order listed, taking care not to wet the yeast. Set to dough cycle and let finish.

Garlic Swirl ingredients:
3 T. butter or margarine, melted
4 cloves garlic, minced
1/4 cup grated parmesan cheese
1 tsp. italian seasoning

combine garlic, parmesan cheese and italian seasoning. Set aside.

Preheat oven to 450 degrees. Grease a 9x5 loaf pan.

When dough cycle is complete, remove from bread machine and place onto a lightly floured surface. Roll out into a rectangle no larger than 9 inches wide. With a pastry brush, evenly coat dough with melted butter. Sprinkle with garlic and parmesan cheese mixture. Roll starting with the long side. Pinch the ends closed and place into greased 9x5 loaf pan. Bake 10 minutes at 450 then reduce heat to 350 and bake for 30 minutes longer, or until bread is golden and sounds hollow when tapped.

You should probably let this cool completely before slicing, but I'm not really into following rules. My swirl separated because I cut it when still boiling lava hot. It was worth it. SO good.

Monday, May 3, 2010

Menu Plan Monday


I've decided to join the Menu Plan Monday at Organizing Junkie. I'm usually good about getting my menus planned in advance, but there are some weeks that I drop the ball and we end up eating take-out. Take-out isn't good for my waist line or my pocketbook, so becoming a part of this is my motivation to make sure it gets done.

We're nearing the end of the month and looking to eat up what we have in the freezer, fridge and pantry before we go out shopping once again. I stocked up on meats earlier in the month, so I have plenty left.

My husband is also going through law school finals this week (good luck!) so everything has to be easy to prepare on a moment's notice. I have no idea when he will be getting home each day and when he does get home, he's starving!

Monday: sweet and spicy chicken in the crock pot (freezer meal), brown rice, tossed salad

Tuesday: quesadillas using leftover sweet and spicy chicken, mexican rice

Wednesday: personal grilled pizza - toppings of choice, tossed salad

Thursday: Red beans and sausage, brown rice, tossed salad

Friday: Red beans and cornbread casserole - a variation of this using leftover red beans and sausage, broccoli slaw

Not a really impressive menu this week, but fast and healthy. Sometimes we all need a week off!

Health food to start the week

I always like to start my week off on a good, healthy foot. Smoothies have been my go-to breakfast for a few weeks now. After some tweaking, I found a recipe that was excellent. It was sweet, packed with nutrition and it kept me full until lunch. I really like smoothies because they are an easy way to get in a lot of your fruit and vegetable servings and they don't weigh you down. I never feel like I should take a nap after a smoothie.


This recipe is a green smoothie. Don't let the color or the spinach throw you off. It packs a big nutritious punch and you can't even tell it is there.

You're getting so much Vitamin A, Vitamin C, Calcium, and Potassium with this smoothie. It is a great immune booster with all of the Vitamin C!

Also, as far as taste goes, I served it to the toughest of critics -- my kids. They both loved it and asked for more. My 3-year old loved the green color.

Green Smoothie
Serves 1

1/2 banana, peeled and broken into chunks
1/2 peach, frozen is fine
3 strawberries, hulled
1 kiwi, peeled and quartered
1 large handful raw baby spinach
enough liquid to get it moving (I usually use water, but you can use milk, almond milk, orange juice)
1/4 cup plain yogurt (feel free to substitute with flavored)

Put all of the fruits in the blender along with a little liquid. Pulse until smooth. Add baby spinach and, if necessary, a little more liquid. Pulse until well incorporated and the spinach is very finely chopped. Add yogurt and pulse a few more times until mixed.


Sunday, May 2, 2010

Sunday Morning Pancakes


Excuse me if I start to trail off, it is the breakfast coma setting in. Long night last night and rough morning with the kids warranted something decadent for breakfast....and this isn't even bad for you! In moderation of course. Don't eat the entire butter roll and then get mad at me when your pants don't fit.

I've tried many pancake recipes. I always gravitate towards whole wheat pancakes because they seem to fill me up faster and keep me full longer. Yay for unprocessed foods!

The best part about the pancakes is they are quick and easy. Tangy from the buttermilk and a bit nutty from the flour. Feel free to experiment with additions. My family is particularly fond of bananas added just before they get flipped so the bananas caramelize a bit. You could easily add blueberries, chocolate chips, peaches...get creative!

This morning, these pancakes were a vehicle for this amazing butter I made last night. I ran across a recipe for strawberry butter, but wanted to improve on it. I have a boatload of basil growing in my garden and love the combination of strawberries and basil. It might sound a little odd, but trust me. The basil adds such a refreshing touch to the strawberry and butter combination. It really cuts the richness of the butter. Feel free to experiment with the amounts of sugar or omit it completely if you have really sweet berries.  I only had frozen but am anxious to try it with fresh. Unfortunately fresh berries never last long as my kids are scavengers at heart and can sense whenever they are in the house. If you are using frozen berries, it is imperative that they are thawed.

Let's get to it, shall we? Hungry kids await.

Whole Wheat Buttermilk Pancakes
serves 4

1 cup whole wheat flour (use whole wheat pastry flour if you don't want the look of whole wheat)
2 tsp. baking powder
1/4 tsp. salt
1 cup buttermilk
3 large egg whites
2 tsp. oil
1 T. honey
1/4 tsp. cinnamon
1 tsp. vanilla


Mix dry ingredients in a bowl, create a well and add wet ingredients. Stir until just mixed. Don't over-stir!

Heat a large skillet or griddle to medium heat. Spray with cooking spray. Use 1/4 cup measure to spoon out batter. When the batter starts to bubble, add your additions if you wish (bananas, chocolate chips, peaches..) When the edges set, flip.

Top with syrup, jam, honey or my favorite Strawberry-Basil Butter!

Strawberry-Basil Butter

1 stick butter (1/2 cup)
2 cups fresh or frozen strawberries (frozen MUST be thawed)
4 basil leaves
1/3 cup powdered sugar

Combine all ingredients in a food processor and pulse until combined. Spoon into a bowl and refrigerate until firm. I would recommend making this the night before so it has time to set up.

Have a great Sunday! I'm going to work on picking up the pieces...
 

Saturday, May 1, 2010

Amazing Shrimp Curry


I can't extol the virtues of this enough. I could probably eat it 3-4 times a week and be completely happy.  Shrimp is low calorie, high in flavor and cooks fast! It is really versatile as well, from a simple grilled shrimp salad to this flavorful, fiery shrimp curry. The possibilities are really endless.

The comes together fast. 15 minutes from start to finish. The most time intensive part is cooking your accompanying rice or tossing a salad.  It is probably faster than sitting in the line at the drive-thru and MUCH more figure friendly.

This is a pretty basic coconut curry and would be a perfect slate for any of your favorite vegetables. Of course, you can just leave the vegetables out but they provide bulk and filling fiber without many calories. Opt for the veggies, your waistline and heart will thank you. Possible additions: sugar snap pea pods, julienned carrots, parboiled sweet potatoes, eggplant, etc. etc. etc. You could even change up the protein and make it with chicken, though I am partial to the shrimp. I love the subtle sweetness it provides.


Coconut Curry Shrimp
serves 4

1 tablespoon canola or peanut oil
1 red bell pepper, julienned
1 medium onion, halved and sliced
4 cloves garlic, minced
1.5 tablespoons thai red curry paste
1 pound large shrimp (20-30 works fine)
6 oz. light coconut milk
2 teaspoons fish sauce (optional, but it really makes the dish)
5 green onions, chopped
1/4 cup cilantro, chopped (optional)
kosher salt to taste

In a large skillet or wok, heat oil over medium-high heat. Add bell pepper and onion and saute until just starting to get soft, about 2 minutes. Add curry paste and saute 1 minute until it just starts to get fragrant and is well incorporated. Add shrimp and garlic, season with a few pinches of kosher salt and saute about 2-3 minutes. Add coconut milk and fish sauce and mix well. Reduce heat to medium and simmer 2-3 minutes or until shrimp is cooked through. Remove from heat and mix in green onions and cilantro.

I served this with jasmine rice and a green salad.

Enjoy!
 
Related Posts with Thumbnails